Sunday, 19 July 2015

Handmade How To: Daily Toning Skin Cleanser with just two ingredients!


In keeping with my desire to eliminate micro-plastics, chemicals and things I can't pronounce from my daily routines, it became necessary for my to start making my beauty products at home. Not only did this simplify my whole routine, it saves me money and ensures I know exactly what I'm putting on my skin! I'm 35 now and I've always had difficult skin. Sometimes its dry, sometimes it's oily. Sometimes it comes out in blemishes. At certain times of the month, my hormones send it into some sort of panicked combination of all of them! I also used to use lots of make up, make-up removers, toners, cleansers, moisturizers, scrubs and face-masks. Not only did they cost a small fortune, I was never convinced I looked any healthier for it. I'm now committed to keeping it simple and keeping it natural.

Witch Hazel is a natural astringent and is great for balancing oily skin. It also heals and soothes minor irritations, so is beneficial for problem skins. Rose water awakens tired skin and cleanse pores, removing residual make up along the way. 

This simple toner contains only two ingredients and acts a cleanser in my morning and evening routines. I only wear make up a few times a week, but when I do I use coconut oil to remove it before washing with a handmade natural, mild soap. I then apply the toner. If I've not been wearing make up, I tend just to wash with water and finish of with the toner. 

As ever, it's cheaper if you can afford to buy in bulk. However,  if you're just having a go, these ingredients you could get from local chemists and supermarkets. You will need:

  • Rose Water (the best quality you can afford. Make sure it's made from genuine rose oil and not a synthetic essence)
  • Pure Distilled Witch Hazel (Hamamelis Water)
  • Reuseable Glass Bottle

Because I am now making a lot of my own products I have bought a selection of glass bottles and jars online. I get mine, along with many of my supplies, from Baldwins as they stock a good selection of sizes at reasonable prices, though you can get them from many retailers. 

To make this cleansing toner, simply fill your bottle one third full with the rose water and fill the remaining two thirds with the witch hazel. Store somewhere cool and dark.

To use, just apply a little of the toner to a cotton pad and gently wipe over your face. Avoid the eye area and do not apply to broken skin! If you've never used either ingredient before, test on an inconspicuous area first. Although rare, some people are allergic to witch hazel and you don't want to find this out after using on your whole face. Should you present any adverse reactions or accidentally swallow the toner seek medical advice immediately! 


The best way to keep skin looking good is to reduce the toxins in your body by eating healthily and drinking lots of water! Avoid wearing make up every day. It's okay on occasion, but it does clog your pores and affects to youthfulness of skin. Keep your beauty routines simple and avoid loads of different products all doing different things. They all contain chemicals  (even manufactured ones branded as 'natural' for the most part) and they're all asking different things of your skin. Next time you're in your bathroom take a look what you're using. Do you know what those ingredients actually are? If not, why would you want them on your skin and in your body? I'll be sharing more of my homemade alternatives soon, so join my blog for more natural beauty tips coming soon!

Basic Risotto Recipe with Rocket and Fresh Vine Tomatoes (Vegan


This risotto recipe is the basic one I use when experimenting with ingredients. I have used a simple mix of rocket and tomato, but have added ideas for variations along the way! Freshly picked garden ingredients are always best, but a trip to the farmers market should get you some good fresh ingredients that haven't traveled too far.

I guess these ingredients would serve three or four, depending on your preferred portion size. I generally cook for the two of us, then have some the next day too. As ever I would recommend reading through the whole recipe before you start as I give you a few options and ideas for substitutions!

Ingredients


  • 4 tbsp Rapeseed Oil
  • 1 large Red Onion, chopped finely (I also added four baby shallots, cut into quarters, but these are vital if you don't have them)
  • 2 large Garlic cloves, chopped finely or crushed
  • 12oz Arborio Rice
  • 4fl oz Cooking Wine. White Wine is best, though I have used homemade wine before and it turned out just as well!!
  • large handful grated vegan Cheese. A strong cheddar style one was used in this recipe, but I have also tried a blue-style one and a smoked one before; they give good flavour according to your preferences, so are worth a try if you make this more than once!
  • 2 pints (just boiled) vegan Vegetable Stock
  • Handful of small, sweet vine Tomatoes, cut in half (Piccolo are a good variety). 
  • Handful of fresh Rocket leaves, washed. Baby Spinach, chopped Kale or Samphire (for those lucky enough to live near the sea!) work equally well and can be substituted or used as well.
  • 12 fresh clean Basil leaves (optional)
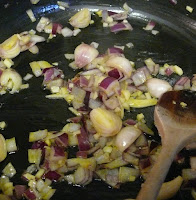
In a large, deep frying or saute pan heat the oil and begin to soften the onions, then garlic. Stir frequently until they appear to be cooking, but are not yet browning.

Add the rice and give a good mix until its all coated in oil and starting to heat. Let it cook like this for a couple of minutes before pouring over the wine. This will steam and fizz, then evaporate quickly. Now start adding the stock a cup full at a time, allowing much of it to be absorbed before the next cup is added. The pan should be on a steady simmer and not a boil at this stage. You want the rice to soak it up slowly and do not want it to be swimming in liquid all at once.Stir continuously to prevent the rice sticking to the pan.


Continue to add the stock until it's all used up. The rice should start to go translucent and upon tasting should be soft, without being crunchy when bitten.

When the rice appears to be getting near it's time, add the tomatoes and greens (whichever you choose to use) and stir into the rice. When it is right, it should be creamy in consistency, not sloppy nor dry!

Remove from the heat and stir in most of your cheese, saving some to one side. The cheese should start to soften and melt a little.

Take a little of your reserved cheese and sprinkle in the bottom of the bowls you will serve in. Serve up the risotto with a ladle into your bowls. Sprinkle the remaining cheese on top and garnish if you wish with another sprig of basil. Serve immediately.

Arborio rice is a useful thing to keep in the pantry as so many things can be made into a risotto! This basic method can be used to make all manner of interesting risotto combinations. You could use young asparagus tips, leek, courgette, spring onion, french beans or pumpkin just by adding at the beginning and cooking with the onions. I like to experiment with fresh harvests and use this recipe when I have only a handful of things ready to pick.  


Friday, 10 July 2015

Spiced Rhubarb Cake (Vegan)


This is one of my favourite seasonal cakes. There is nothing quite like pulling the first bundle of rhubarb stalks from the garden! I used to make this a lot when I was vegetarian, so I wanted to see if it would work okay with an egg replacer. I'm pleased to say it does! It contains a lot of fresh rhubarb, so is a very moist, almost gooey cake that gets stickier after a day or so. It doesn't keep for long due to the fresh ingredient, but I've never had a problem with this as it's all eaten after a couple of days anyway!


Ingredients

5 oz Vitalite or vegan butter alternative
10oz Self-Raising Flour
2 tsp Allspice (or Mixed Spice if you prefer)
1 tsp Ginger
3oz Dark Muscovado Sugar
6oz Golden Syrup
1 tsp Bicarbonate of Soda
Vegg (Baking Mix) equivalent to 2 eggs
10oz Fresh Rhubarb, chopped into half inch bits

-

Heat oven to 180 C and put the kettle on. Grease and line a deep 20cm square cake tin (or loaf tin as I use).

In a large mixing bowl beat together the vitalite and sugar until light and fluffy. 

Beat in the golden syrup or use a mixer for ease.

Dissolve the bicarbonate of soda in 200ml boiling water, then gradually mix into the vitalite mix. 

Sift in the flour and spices. Mix briefly before adding in the egg mix.

Once mixed well, gently stir in the rhubarb.

Pour the mixture into the tin and bake for 50-60 mins, until the cake feels firm to the touch and springs back when pressed. It's difficult to check with the usual 'stick a knife in' method as even when cooked the rhubarb makes the middle quite wet. Try it anyway as it will be obvious if the centre to still too raw! My oven is rubbish, so it always take me longer to cook this than when I've made it elsewhere. I'd advise you to check on it regularly and be prepared to increase time if necessary.

Cool in the tin for 15 mins, then turn out and cool on a wire rack. Dust with icing sugar if you want to, but I never bother. It's lovely served with soya single cream or vanilla ice cream! 

Tuesday, 7 July 2015

Potting Shed News: Eco Plant Pot Maker

As regular readers will know, I'm trying to develop a range of eco-sensitive products which can be handmade out of sustainable materials. With all the time I spend in the greenhouse growing our food, a paper pot maker has been on the list for a while! Well this weekend we had a go, putting the lathe into service and making a functional finished product.

I've seen them before and wanted to see if we could make one. It seemed like a good investment as it means never having to but plastic seed modules or pots ever again! Using them instead of plastic modules means less disturbance to the delicate new roots and less chance of me getting carried away and planting way more seeds than I have room for once potted on!  It turned out well and now I have no need to use plastic plant pots for my seedlings! We are now going to add these to the range in our Etsy shop, for all of those that don't have a lathe and so can't make one at home! My father has a huge pile of wood donated to him buy various friends that know he does woodwork. We're not always sure what sort of wood it is, but if we can we try to label it as it comes in and before it is put away to dry.  


The pot can made from recycled newspaper or (old/damaged book pages!). I prefer to secure mine with a little twine, just to make them neat, but this isn't vital as they'll work fine without securing. After a while the paper will start to break down and the whole thing can be potted on into something more permanent or planted out in the garden. 

To use you get half a sheet of newspaper. I've decided to make mine thicker, but you can make them using half as much paper, though the walls of the pot will be quite flimsy, especially once wet!


Fold the paper four times (in half and then half again)


Wrap around the pot maker and fold in the ends. You can tie with twine at this point if you like.


Firmly push into the pot maker base. This compresses the bottom so that it keeps its shape.


Carefully pull off the paper pot and it's ready to use! I line all of mine up into a seed tray, just to hold them upright and it's worth remembering that the less you can handle these the better once wet.


I've just listed my eco-pot makers on Etsy with worldwide shipping available. Although I would prefer people to source things as locally as possible to reduce pollution miles, I will post these out if you're unable to find a local, ethical maker! Woodturning is a popular hobby, so why not see if you have a local crafter willing to take commissions? To view our listing visit our Etsy or Folksy shop.


Fruity Mincemeat

Take 40 minutes out of your day and make enough mincemeat to see yourself and half your family through the mince-pie eating season! I usual...