Friday, 5 June 2015

Imam Bayildi Wraps - Sweet Spiced Auberine/Egg Plant (Vegan)

This dish is usually served in aubergine shells, however I prefer to use it as a hot wrap filling.

You will need to make or buy some tortilla wraps to serve. (At some point I'm going to try using these as baked wraps, as I do with my chili-wrap filling, but not today)

Ingredients for the Imam Bayaldi to serve four

2 tbsp Olive Oil
2 Onions, very finely chopped
4 small or 2 large Aubergines (or Egg Plants for my American friends)
4 tinned Plum Tomatoes, finely chopped
2 oz Sultanas
2 tsp Ground Mixed Spice
2 tsp Sugar
2 Garlic Cloves, crushed or finely chopped
2 Bay Leaves


Add the olive oil and the onion to a pan and gently cook until just soft.

Finely chop the aubergine and add to the onions, along with the remaining ingredients.  Cook (covered) over a medium heat for 15 - 20 minutes. It's at this point you may see where this dish's other name, The Fainting Imam, comes from. The smell is divine and definitely worth a little swoon! Traditionally this mix was scooped into aubergine shells and served cold, however I prefer it still warm. Pull out the bay leaves, then divide your mixture between the tortillas and wrap them up in the usual way for serving. 

Wednesday, 3 June 2015

Basic Flapjack Recipe with Damson & Spice Variation (Vegan)

This is one of my favourite sweet treats! I start by making a basic flapjack mix, which can then have anything you want added to it. In this version I'm adding fresh damsons and warming spices. 


Damsons are one of my favourite fruits, but are not widely available, so dark-skinned plums are the next best thing. I'll come back to the damsons at the end of this post, but for now lets get cooking! 

Usually I measure ingredients in lb and oz, but for this recipe we'll be using cup measures as it makes it all so much easier.

Ingredients for basic flapjack

1 1/2 cups Vitalite (You can probably use any dairy-free spread, but I haven't tried them!)
9 tbsp Golden Syrup
5 cups basic porridge oats
1 1/2 cups soft brown sugar

Sunflower/Vegetable oil for greasing the tray

For the variation

1 tsp cinnamon
1 tsp mixed spice
4 damsons/plums cut into 1/8 sections 

You will also need a shallow tray-bake type tray, oiled and lined with grease-proof paper. 

 Start by gently melting the Vitalite on the hob. Take care not to cook the stuff, so it's better to put on a very low heat and wait patiently :-) 

When it's melted you mix in the oats, syrup and sugar. It takes some stirring and after a time you'll see that it gets a good gooey consistency. 

At this point you have your basic flapjack. If you want, you could cook it plain or take the opportunity to add your favourite dried fruits, nuts, seeds or spices. (A few ideas I'm going to try are listed at the bottom!) 

To the plain mix you now add your spices and fruit, combining well.


Tip out into your prepared tin. I use a tin slightly larger than I need so that the mixed can be poured and pressed in the centre, leaving the ends away from the tin. This isn't vital, but you'll find that the flapjack gets very crunchy where it touches the metal and I prefer to have as much soft flapjack as possible! 


I find that there is a huge variation in ovens and their efficiency. I'm going to share how I cook these according to my temperamental oven, but you may find it prudent to keep an eye on your flapjack while cooking as you may have to adjust cooking times according to your own equipment! 

I place my tin in the bottom have of my oven, which has been preheated to 180 C. I'll turn the tin around a few times during cooking as my oven doesn't cook evenly and I have hot spots! For me it takes 30 minutes to cook these, but I would check often after about 20 minutes to make sure they're not getting too well done. When it's cooked it should be firm but not crunchy. You should be able to score your cutting lines without them merging back together! 

Allow to cool completely before cutting the flapjack into sections. Flapjack is one of those things that everyone seems to like done differently. I like mine quick soft and gooey, not at all like the crumbly stuff you often buy in the shops. It's worth experimenting a little and adding different things to perfect this recipe to your own tastes. 

-

I chose damsons for this recipe as I find they work so well with spices (try making a spiced damson oaty crumble!) but as I said they tend not often to be stocked by supermarkets. They are a subspecies of plum, but with a different flavour to most plums you can buy. I'm a great fan of orchards, so if you have a sunny space why not consider growing one? They're a little bit different and, I believe, worth the effort. My current plot is too small, but when I can spread my wings a little I intend to have several different varieties (along with greengages, another favourite of mine!) 

When it comes to using fresh fruit in flapjack some care should be taken, but I think it's worth a little experimentation. I am going to try fresh raspberries in my next batch, maybe then drizzled with dark chocolate!

Other ideas for varied flapjack could be stem ginger or dried fruits such as blueberries, crimson raisins, cranberries, apricots and apple. 

If you have a go at any variations I'd love to hear about them!   


Monday, 1 June 2015

Our Summer Break in Scotland


Well we're home now from our little break in Dumfries and Galloway. We had a great time walking and nature watching, admiring bluebell woods and sitting up at sun-set to spot otters.

For me it was an inspiring trip too. As we visited various places I picked up many ideas that I can use in future projects and we both had to overcome the challenges of finding vegan food while we were out! 

One of my favourite parts of the trip was the visit to Samye Ling Tibetan Monastery in Eskdalemuir. There you can go to relax and be at peace. The environment is perfect for escaping modern life! We had a happy hour in the little vegetarian cafe, where they prepared a cheeseless toastie and hot mug of chai tea for us. A walk around their kitchen garden made me a little envious of the space. They has large, orderly beds of various herbs. I've never seen such a lot of horseradish in one bed! The chives and mint looked wonderful too and made my army of little pots look a little feeble.


We also had a good walk along the riverbank there and left feeling like we'd had the perfect start to our holiday. Over the course of the next week we did much walking, mostly through bluebell woods and with many stops at hides to watch wildlife. The red squirrels were a highlight as we don't get them in Cambridgeshire. It reminded me of the delight in welcoming wildlife into my garden.. Nature is a wonderful thing and sorts itself out without our meddling. This little squirrel was at Threave House and Gardens, which is owned by the National Trust for Scotland. We also saw them at Ken Dee Marshes and Eskrigg Reserve. Other wildlife highlights were seeing Osprey at Threave Castle, sitting out at 11pm to see otters at Wood of Cree and watching a wonderful show by the Swallows and House Martins at Wigtown Bay.


The wildflowers were looking lovely everywhere we went and I'm pleased to have seen some happy bees along the way. If I'm honest I didn't see as many bees as I would have expected for the amount to blooms that were out. We found some beautiful coastal flowers down by St Ninian's Cave, on the Wigtownshire coast. The walk to the coast is a scenic one at the moment, being through a woodland with bluebells and wild onions. We heard many birds in the trees on the mile long path between the car park and the pebble beach; the highlight for me was seeing a tiny Goldcrest! When we got down onto the rocks we were treated to this beautiful array of colourful flowers.


If you're looking for an unspoiled area, with massive amounts of interest then you can't go wrong with a trip to Dumfries and Galloway. The people are more than welcoming and there are so many things to see, you'll be booking your second holiday in no time! We were lucky with the weather and didn't really have to change our plans to accommodate it.  If you'd like to view my holiday snaps you can see them on facebook.

As ever the only downside was the lack of freedom when it came to finding places to eat out. We made ourselves picnics everyday, but it was noticeable how difficult it is to just pop in somewhere for a cup of tea and a cake after a long walk. We found a couple of places that had maybe one or two vegan options, and another that was happy to change one of their snacks to make it suitable, but there is a long way to go yet! We did find a cafe in Wigtown called ReadingLasses that had soy available and a couple of vegan options, which was welcome. There is definitely a need for more suitable cafes with the amount of people getting clued into the damaging effects of a non-vegan diet! I did stop into my favourite little health shop, Sunrise Foods in Castle Douglas, while I was there and stock up on a few things I can't get easily in England. It's a great place to buy loose teas, coffee, herbs and spices! 

For me it's back to work and my little eco-mission. No more holidays for us this year! Over the coming weeks I'm going to be experimenting with various recipes in my continuing attempts to replace my store bought products with homemade alternatives... follow the blog or like us on facebook to see how I get on! 


Sunday, 17 May 2015

Victorian Style Compost Bins


Look at these for composters! These brick compost bins were found at Barnsdale Gardens in Rutland. They are built to a Victorian design, which used old, left over bricks. There was a little notice to one side saying that the only downside was that the whole structure had to be taken down and reassembled whenever you needed to extract the compost! I think it would be worth it to have something this interesting on the plot!

You can see the rest of the days photos on my English Cottage Garden's facebook page HERE

I had a wonderful visit and was very excited to visit on allotment day! It made me quite envious of those with large gardens. I get on alright with my containerized veg, but I'm now more determined than ever to work towards a larger plot. There was lots of ideas to be had during the visit though. Some good examples of using what you have to hand in order to build things and (as anyone familiar with Geoff Hamilton's time on Gardeners' World will know) how to make rockery rocks out of concrete! Geoff was a pioneer of organic growing and I'm pleased to see the gardens he created are thriving and as inspirational as ever. 

Monday, 4 May 2015

Unpronounceable bubble bath... and why I'm voting Green this election.

This will be an odd little update as I have a selection of random thoughts cluttering up my mind while I type. As I tap out this sentence I haven't even come up with a title for this blog post, just because I don't really know what I'm going to say yet. It also explains that rather lame introductory sentence! To update those reading that haven't been following my blog, I'll outline my world very briefly. (This also helps focus my mind somewhat). 

I guess my eco-story started many years ago. I've always had an affection for nature and I grew up in a vegetarian family; I was always the one picking slugs off the path on rainy nights, so they didn't get trodden on. I guess those were my first steps toward the person I would become. In recent years I've seen so many people changing their lives for the benefit of our future world and I've decided to make a conscious effort to count myself among them. 

I admit that in my younger years I was as much an avid consumer as everyone else. I loved shopping and nothing was more exciting than a trip into town to find a bargain or two, especially if buying shoes was involved!  In some ways I was forced to change my ways, from a financial point of view at least, when I went from having a full time job to working only two days a week. I decided to leave my 40 hour a week office job when I realized that the money that came with it wasn't worth the stress it created in my life. I often worked up to 55 hours a week just to keep on top of the work; additional hours always unpaid. I found that if I just lived a more modest life I could actually afford to create that perfect work/life balance. That's not to say that my days away from work are spent lounging around enjoying the scenery. With less money around I'm spending my days growing what food I can, cooking all our meals from scratch (going vegan was also a factor in this) and general housekeeping. I'm getting into making my own household products, which takes time initially, but in the long run is more cost effective and healthier. Limited spare cash also means that I don't have fancy holidays, new cars or loads of nights out. Thing is, now I'm happier in life I don't really feel a need for them and I don't miss them. Unconsciously I was buying myself treats to cheer myself up, when all I needed was to live a different sort of life.

Fruit growing is a little addictive. What could be more exciting than a flower bud, that will turn into yummy berries this Summer! 

I work for the National Trust, a conservation charity, during the Summer season at the Wicken Fen National Nature Reserve. This closeness to our historic landscape, with all the thousands of species that call it home, has also changed me. Not only did I first meet my boyfriend there last Summer, I now feel that I have a job that compliments my life and way of thinking. 

The last six months has been a bit of a roller-coster for me and that was partly why I created this blog. I wanted to share the things I learned and I wanted to connect with people that would share my journey. My ultimate goal is to learn the skills to build myself an earth home and create a plant-based small-holding where we can be largely self-sufficient - off-grid and less dependent on the world as a whole. I honestly believe that individuals have the power to change the fortunes of our planet and my way of doing that is by taking responsibility for my impact on upon it. I'm on a personal mission to eliminate plastics, promote handmade, eco-responsible products over mass-production and generally think about the consequences of every action I take. What pollution was created in making the thing I'm using? and what pollution will be created when I dispose of it? What resources were used in it's manufacture and can they be replaced? Can the item I'm using be re-used or must it be disposed of after one use? Is there a second-hand or naturally made alternative? All of these thoughts fill my head with every item I see and use. It's not something to underestimate. Once you start looking at the world like this you realize how blindly we act just getting through an average day. I am taking things slowly, allowing my habits to change and allowing my thinking to adapt organically. 

As you may have noticed I am using this blog post to reflect a little. This Thursday is my 35th birthday and I look upon it as a firmly placed milestone. This is the year I am making the most significant changes to my life and I will one-day look back upon it and reflect again. This Thursday is also election day, which any readers in the UK will have been unable to avoid noticing. I have never taken an interest in politics before, but for the first time in my life I'm actually looking forward to heading down to the polling station. Once you start taking interest in the world around you, you can't help but be inspired to act. Like many people, as a younger voter I always subscribed to my parents view and voted in-line with the rest of my family. As I have become more aware I have, almost by accident, taken an interest in the party policies. I suddenly notice when so-and-so of this party states that they support the badger culls, or thingme-bob of that party is supported by businesses involved in fracking.I'm not interested in much else they have to say, I already know they don't share my views. Then I notice a party that seems to want all the things that I want. A better future for our planet as well as the people (and creatures) that live on it....

As you may have guessed, I'll be voting Green this Thursday. I've had a few challenges when I've told people about this. Probably the most noted being from my own boyfriend, who is currently studying animal conservation at university. We were discussing which way to vote when he said that, while he liked the idea of going Green and appreciated some of their policies, he was worried that they hadn't enough experience at running a country. What happened if they came to power in the future but then crapped it up, due to inexperience? I think this thought has possibly crossed a few minds as this party has risen in prominence. My answer to him, however unhelpful it may have been, was to remind him that the top two parties both had centuries of experience and they had still managed to crap it up. The only way you get to have an opinion about the way the country is being run is to vote for whoever you truly believe in and take the risk. At worst it'll be another few years of people complaining like hell and blaming the government for every bad thing that happens to them. At best, it could be a new way of living in this changing world.  I know a lot of people this election will vote strategically, 'Lets get this person out by voting for their nearest competitor'. For me, this just makes them part of the problem, for when that person turns out to be no better than their predecessor they only have themselves to blame. So, whoever you choose this Thursday please go with your heart and do something to connect with those that may shape your future. 

I'm heading back into my own little world now. I was reading the ingredients list on the back of my bubble bath this morning and I no longer wish to bathe in unpronounceables... I have to find a way to make my own! Until next time friends.


Wednesday, 22 April 2015

Recipe - Earth Day Pie (Vegan Veg and Gravy Pie)

My boyfriend has recently gone over to a vegan diet and I find I have been spending a little more time in the kitchen trying to make a good selection of fresh food dishes. We are very fond of hearty, winter food in this house and I had a fancy for a rich pie and mash type meal. I had a quick look over the internet and couldn't find exactly what I had in mind, so I thought I'd just put something together as I saw fit. As it's Earth Day it seemed appropriate to name this vegan pie, full of veg that can be grown in any small patch, after the day on which it was created! 

This pie went into an eight inch pie dish, which would serve four as part of a main meal. I served it up with mashed potato, sweetcorn and an onion and beansprout gravy.

For the pie you'll need:


  • 1 1/2 pints vegetable stock
  • 1 potato (baking size)
  • 1 sweet potato
  • 1 parsnip
  • 1 medium sized carrot
  • 4 baby shallots (or onions if you prefer)
  • 2 large garlic cloves
  • 2 medium sized mushrooms
  • 1/2 pint vegan gravy (I used a whole sachet of Polish dark gravy in 1/2 pint of boiling water to make it really think)
  • 500g pastry (I use puff pastry, but shortcrust works just as well)
  • 1/2 tsp dried sage
  • 1/2 tsp dried oregano (you can use a mix of your favourite herbs if you prefer, I just like sage and oregano as a combination!)
  • rapeseed oil for frying (olive oil if you prefer)
  • almond milk for glazing (soya milk can also be used)


Method

Pre-heat your oven to 200C

Put the vegetable stock into a saucepan and bring to the boil. Peel and chop the potato, sweet potato, parsnip and carrot into small slices or cubes and add to the stock. Remember that the smaller the pieces, the quicker it will cook, so I find that pieces around half an inch cubed or slices an eight of an inch thick are best. Boil for a short while and then allow to simmer until the veg is tender but not mushy.


In a small frying pan, heat a tablespoon of rapeseed oil. Top and tail the baby shallots, taking off any outer layers of skin that are dry or damaged, then add to the oil. Finely chop the garlic and add this to the oil. Finally peel and cut the mushrooms into quarters, before adding these to the oil as well. As with the root veg, you want to gentle cook until tender, but not overly cooked. 


When the root veg is tender allow it to cool a little, then drain off the stock and add it to a large mixing bowl. Add the shallot/mushroom/garlic mix to the bowl too. At this point you can pour in the think gravy and give it a good stir.  Set aside while you see to the pastry.


On a floured surface prepare to roll out the pastry. Before you start rolling, sprinkle the pastry with the dried herbs so these are pressed into the pastry as you roll. Use the pastry to line the bottom of a pie dish and neaten up the edges with a knife.


Give the veg mix a good stir and pile into the pastry case. Lightly press out any air and smooth over the mound ready for a pastry top. 


Brush the edged of the pie with almond milk and roll out the remaining pastry. Drape the pastry over the top of the pie and press down the edges to seal. Cut off the excess pastry with a knife and using a fork or something similar, press around the edge to bind in a decorative way.


Make four cuts in the top to let out the heat and brush the top with almond milk. Place in a pre-heated oven  for 35 to 40 minutes. Ovens vary a great deal, so I advise you to start checking it regularly from about twenty minutes in.... 


Here we have my Earth Day pie. You can really make this recipe your own. You could use any combination of fresh veg as long as it's par-cooked first and you could even add some vegan meat substitute if you wished. The most important thing it to get your gravy nice and thick (custard consistency!) so that is mixes well with the vegetables and doesn't just run to the bottom of the pie.


Friday, 17 April 2015

Handmade How To: Making Your Own Natural Wax Container Candles

I've always loved candles. Some I love for the wonderful scents they fill a room with, while others I will just light to watch the comforting glow of their flickering light. Nothing says 'sit a while and relax' more than a flickering candle in a darkened room. They are useful too of course; when the power goes out we all need something on hand to see by!


Container candles are the easiest and most inexpensive candles to make yourself. While I admit I can't always resist buying candles from craft fairs or high street shops (even though I make and sell them myself!) it's definitely cheaper to make your own if you use them a lot. They also make great homemade gifts! 

In this post I'm going to share some tips on making your own basic container candle, with some ideas for making them a little more fancy for gift giving. I will also share where I buy my supplies from, though these may not be of so much use to those reading from outside Britain. I have added item links to the online shops I get my supplies from. A quick internet search will reveal dozens of candle-making outlets and it's sometimes fun to shop around to see what different companies are making. I have chosen my products based on my best experience, which does mean getting things from several different companies. You may prefer to save on postage and get all your supplies from one place. You will also find that buying in bulk is the most cost effective way to buy, however this only really works out if you're planning on making a lot of candles! To start with it's worth paying a little more and having a go until you've found products you're happy working with. 

I will also note that for this method I am using natural rapeseed wax. I mention this because for me, this is the most local, least air-miles option. Rapeseed crops are grown in swathes of sunshine yellow fields across the UK and Europe and as such, is slightly preferable than US grown Soy. Naturally, if you are outside Europe, you may need to do a little research to find out what your nearest 'local' wax is. Rapeseed wax is relatively new and because the vast majority of candle-makers using natural wax utilise soy, it is a little more expensive. That said, when you look at how much you can get for your money, against the prices of some container candles for sale on the high street, it still makes sense in my opinion. Both rapeseed wax and soy work in similar ways, but you will find if you're making candles to give away that soy holds a colour better, so your finished product may be prettier. 

First off, the very basics you need to make a functioning candle are:

For the Container Candle:
  • Rapeseed Wax
  • Wick (There are hundreds of variations, so the link here is to the multi-purpose wick I use in my little jars)
  • Wick Sustainer (they're the little metal bits that hold the wick to the bottom of the container)
  • Small Glass or Ceramic Container - I use 55ml/2oz jam jars, which burn for around 20 to 25 hours (it's best to use really large containers unless you use wood wick, as you may find that your wick isn't efficient enough to melt all the wax evenly - I will elaborate on wood wick further on...)
Equipment you'll need (the bottom two only apply if you're waxing your own wick):
  • Microwave and a pyrex jug or hot plate and a bain-marie set up (I'll give instructions for both)
  • Superglue
  • Scissors
  • Stirring stick
  • Oven-gloves or heat proof cloth (the jug of wax will be very HOT!)
  • An old rag to mop up any spills
  • Twigs, broken kebab sticks or lollypop sticks (these are just to lean the wick on while the wax sets and stop it from slipping. 
  • Wooden peg (these I use to save my fingers from hot wax when pre-waxing wicks!)
  • Crimpers or small pliers

To start with I must mention here that you'll be dealing with scolding hot wax while pouring! Do not allow children to be involved in this process; it's also probably safer to shut all pets out of the room you're working in too. Wear old clothes as wax/colour dyes/scent oils can all ruin a good outfit. Don't rush - wax takes a long time to set, so move slowly and pour steadily. Cover your work area with old newspapers or similar.

Preparing your wick and container

Depending on your budget you could buy ready waxed and tabbed wick - this may be easier for your first attempt. If you buy ready-waxed wick you'll need 80mm wicks for the small jars I've suggested. I make and use candles every day, so for me it is more cost effective to buy a roll of wick and a bag of sustainer tabs, then wax and cut them myself.

If using ready waxed wick, skip this paragraph!To prepare wick on the roll you'll need to cut off about a yard of the stuff and pop a wooden peg at the top (this is just so you can dip the whole wick without putting your fingers in the wax). Melt a small amount of wax (following instructions below, depending on whether you are using a microwave or hob). Dip the wick in the melted wax and ensure it's completely covered. I then use a second wooden peg to run down the length of the wick (see picture) to remove excess liquid from the wick.
Lay out the wick on a flat surface so that it's perfectly straight and allow to set. This shouldn't take too long. When it's hard, snip it into sections slightly longer than your container (so that it pokes out the top by half and inch or so). Using crimpers/pliers, pop a sustainer on the bottom of each wick and squeeze the neck together to hold the base of the wick in place.


Take your prepared wick and using a blob of superglue underneath the sustainer, stick it in the middle of your container. Allow to dry completely before pouring wax. Again, depending on your budget, you can buy wick tabs which can make this process easier and less messy. Your container is now ready for wax!


Measuring wax pearls is a skill I have never mastered, so for both methods of melting you will have to experiment a bit. If I melt too much wax for the containers I have prepared, I just pop it a mug and re-melt when I come to make my eco-friendly firelighters!. Alternatively, if using coloured wax you can pour all your over-melts in different colours into the same jar (allowing for setting in between) to make a stripy candle!


To melt wax using a microwave and pyrex/heatproof jug:

I use a 1 pint jug and fill it about two-thirds full with wax pearls. It's quite amazing what this melts down to, but it's usually enough for a few little jars. Rapeseed is a very soft wax and melts down a little quicker than soy or blended wax. I have my microwave set on 50 - 70% power and usually put it on for around four minutes, then add a minute at a time after checking. When the wax is about 95% melted, with just a few opaque blobs remaining, you can take it out and give it a little stir. It is safer to do this than overheat it. Never leave the microwave going or put it on for more than a couple of minutes at a time - remember, wax is a flammable substance and it will reach a flash-point if heated too long. Always use oven gloves or a heatproof cloths to handle your jug as the pyrex can get very hot. 


To melt wax using a hob:


You will need an old milk pan or small saucepan with pouring lip that you don't mind getting waxy. Put a cup full of wax in and then stand this in a pan of simmering water on the hob. You don't want to get the wax hot too quickly or allow it to boil so do not put the pan of wax directly on a hot plate. Using this method you can keep watch and remove the pan when the wax is melted. Never leave the hob unattended.


To make the candle: Once you have your melted wax, carefully pour it into the container. Don't fill it all the way to the top as rapeseed wax tends to dry unevely and will require a 'second pour'. This picture here shows the first pour and illustrates why a second pour is required. This just means you'll need to reserve a little of your wax so that when the container candle has set you can tidy it up with another layer of melted wax over the top. This shouldn't be the case with soy wax, so if using that you can fill to the final level


Take one of your sticks and lay it across the top of the container, ensuring the wick emerges from its centre. Here I've just used other bits of wick!


Allow the candle to set. When hardened, trim the wick to around 7mm. There we have your basic, functioning candle! Next I will go through some variations on the method. 


Larger containers and woodwick

As it's often possible to use any heatproof glass or ceramic container to make candles with, it's important to think about wicking. While it is possible to select different wicks for different sized candles, unless you're going into business making candles and are prepared to do a lot of experimenting, it's a lot of work. I find that for anything over a 30cl tumbler glass or tea-cup sized candle it's easier to use wood-wick. It works well with rapeseed and give a gentle crackle while burning which is quite charming. You can buy woodwick and their special sustainers online. It comes in three sizes, though I tend to use medium for most of mine. The only time I use large wood wick is when making candles in half pint beer mugs.

When using wood wick you do not need to glue the sustainer in place as the wick is lowered into the wax after pouring and centred by eye. When set you need to trim the wood wick to about 5mm. If you leave too much wick exposed your flame will be too large and could be dangerous.

-

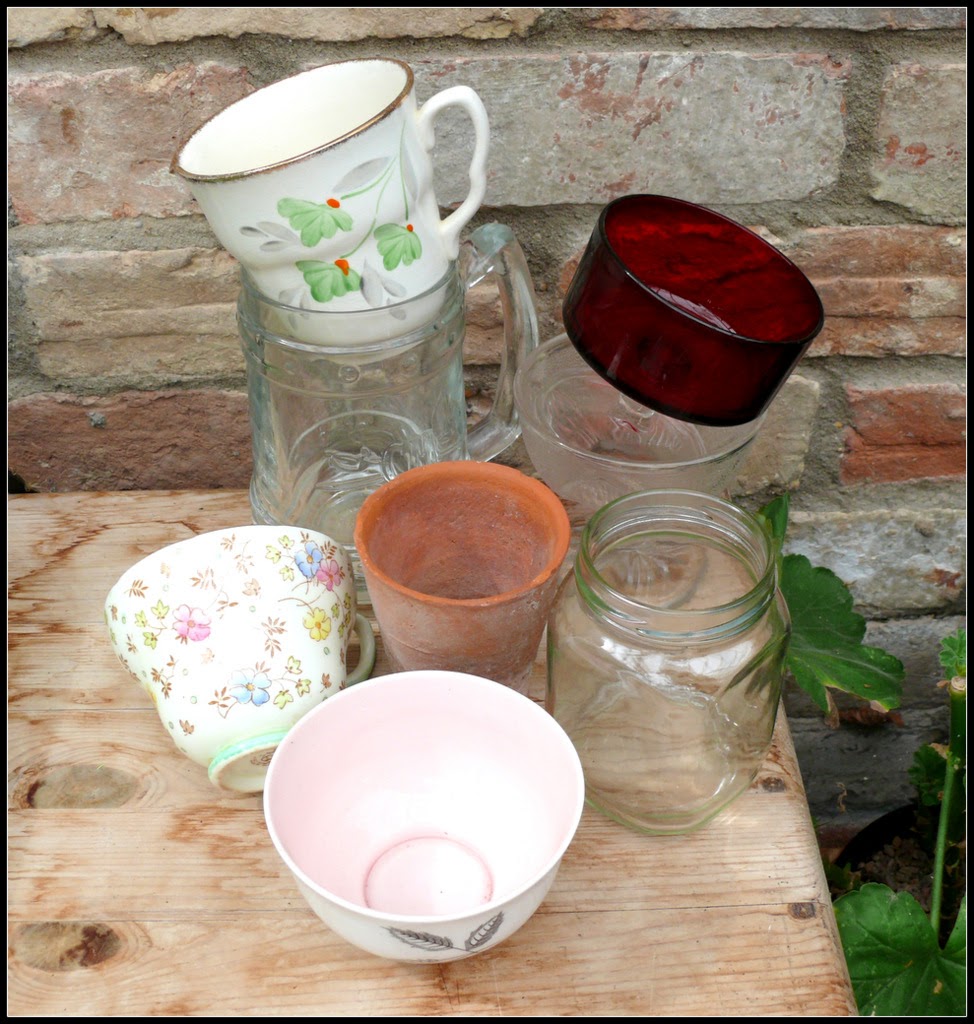
You can buy containers for the purpose of candle making online in various sizes, however it's worth remembering that anything manufactured new is not going to be as eco-friendly. I find it worthwhile keeping your eye out at charity shops and markets for unusual things to use. Teacups, sugar bowls and small dessert dishes are lovely if you're giving the candles away as gifts. Likewise half pint beer mugs and glass tumblers are usually made with a thick enough glass to be okay for use. Avoid glasses which are delicate and have thin walls as these can easily break or pop under sudden changes in heat. If you're making garden candles then you can use terracotta pots providing you seal the hole in the bottom with something flame proof. I've added a few photos here to show things I've turned into candles for my craft fairs...


Colours and Scents

I mentioned previously that rapeseed wax doesn't colour all that evenly, so I often leave the wax its natural creamy white colour, especially if I'm making them for myself. However, if you would like to try colouring or you are using soy wax (which colours well), then I'd recommend buying some little dye chips to have a go with. To use, just scrape off a few shavings into the wax just after melting, then stir until they've completely dissolved. 

If you like scented candles then it's an easy matter of buying fragrances online. You can also use essential oils, for a more delicate and natural way to scent your candles. You usually need very little scent oil, so just add a few drops to your wax just after melting and give it a good stir. The fragrance will want to sit in a puddle at the bottom of the wax, so make sure you give it a good swirl just before you start to pour.

It is worth noting that both colours and scents have the potential to alter the burning of the candle. Try not to overuse them if you can help it. They are also non-natural substances, so if you have a mind for being eco-friendly then you may wish to leave the candle as basic as possible. 

-

With these basics under your belt you can create your own supply of household candles as well as a really beautiful gifts. The great thing about these container candles is that the container itself can be refilled time and again. It is important to add safety information on any candles you are giving away or selling. You can buy warning labels for this purpose. 

Monday, 13 April 2015

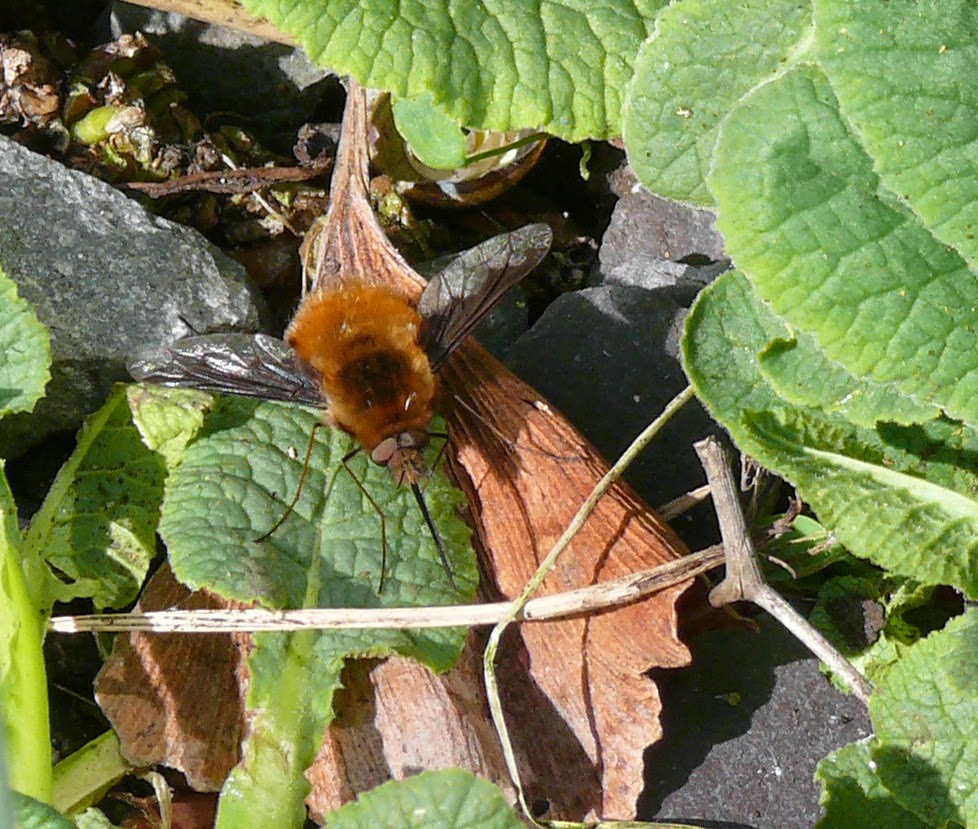
Nature News - Bee Fly in the Garden!


After my rather grumbly previous post, I thought I'd share a little pic of a bee fly I took in the garden today

Vegan Self-Sufficiency and Off-Grid Living


I'm having a bit of a grumble today. While having a little sit down and tea break I thought I'd have a look to see what was happening in the world of facebook. I saw some interesting posts and shared a few to my page 'Making the Change - My Eco-Sensitive Home'. Then I saw some things I didn't really want to see...

You see the trouble with the self sufficient, off-grid living pages, is that most of them cater to your average omnivore. Along with the 'how to generate your own energy' and 'how to reuse everyday waste' articles, they also share a lot of the 'how to cure your own meat' and 'how to raise your own sheep' articles. I don't like seeing them and I don't really find them that appealing when they crop up in my newsfeed. I am working toward a future where I am off grid and largely self-sufficient in food, but I'll be living on a plant based diet. 

 I thought surely there would be a few pages for vegans who did, or wanted to, go off grid - but no. That's to say, if they're out there they don't have easily searchable titles! I follow a few pages for vegans on fb, but sadly so many of them get into the realms of animal rights, that I don't enjoy seeing their posts either. I'm not a fan of gore. I've been a vegetarian my entire life and more recently replacing my dairy with vegan alternatives, so seeing these posts does nothing but upset my mind for the day. So, I've decided my facebook page is a 'positive posts only' page. I'll share only stories of the steps we're taking in a positive way and on ways to improve life, not dwelling on the many horrors in the world (they seem to be well covered by every other vegan, conservation, sustainability page out there.) If anyone knows of any vegan/self sufficiency pages that buck this trend please let me know so I can share them to my page followers!

We recently watched Cowspiracy, a documentary about the meat industry and it's contribution to the global conversation crisis. Regardless of your views on meat/animal rights/conservation I recommend you watch it and encourage your friends to do likewise - it's certainly interesting to see how some of the worlds major conservation charities are dealing with it! If you're veggie or vegan there is one scene in it where they kill a duck, which I averted my eyes from, but otherwise it's gore free. This hour and a half documentary actually does change lives and in turn, the future of our planet... because of it my meat-loving boyfriend is now considering a plant-based diet. Not because he is interested in animal rights, but because he can't feel happy studying conservation at Uni and supporting an industry that is destroying the planet. 

Monday, 6 April 2015

Little changes - Eliminating Plastics

I thought I'd add a little update about some of the small, day to day changes that I'm trying to make. I guess it's worth mentioning that my long term plan is to someday create my own sustainable home, live off grid and be moderately self sufficient. My present living situation doesn't really allow me to up sticks and go 'live the dream', so right now I'm making a slow progression toward my ultimate goal. I'm currently under the impression that any changes in habit and lifestyle I make now will make 'living the dream' an easier transition in the long run. 

I'm quite sure that if all my home comforts were taken away over night I would cope perfectly well, but as I live in a house with people that don't share my enthusiasm for saving the planet I am trying to introduce new things a little at a time.

When I first became interested in this 'eco-friendly' thing I used to see lots of clever ideas while browsing the internet and it did contribute to my feeling of wanting this change. One day, when I have my off-grid little abode, I will undoubtedly take more of an interest in eco-friendly plumbing and creating my own electricity. For now though, my aims are smaller. I am simply looking at my daily actions, and more importantly purchases. I think about how these items are manufactured and where they have come from. I think about how I use them and what waste is created by doing so.   

The most obvious change I wanted to make was the elimination of plastics. Most trips to the supermarket generate a mountain of plastic debris. Since focusing in on this particular issue I have started to really appreciate where I can buy things loose, or in paper or glass containers. The elimination of plastics has several areas to look at:

FOOD PACKAGING: This in itself has really made me think about my diet as well. Many of the loose ingredients (dry goods and fresh vegetables) are healthier than their highly processed alternatives, so by avoiding the packaged foods I'm also avoiding some really unhealthy junk food! Naturally, this has meant more time in the kitchen making things from scratch, but as I enjoy cooking this is no bad thing. Another side effect of buying slightly better quality ingredients, either because they're local and I can buy loose or because they are packaged in glass jars that I can re-use, is that I am conscious of making my money go further. I am eating less food, but of better quality. I have also started looking out for where I can buy ingredients from artisan makers (if I can't grow it myself!). I am fortunate enough to live near a couple of working windmills where I can buy flour and a tea merchant that will weigh loose tea and decant it into my own containers in decent quantities. As I get into this life I'm sure I will find new ways of acquiring the little luxuries I may otherwise miss out on.

EVERYDAY HOUSEHOLD: There are many items around the house that are manufactured in plastic because they are intended to be disposable or because they're not things that many people want to invest money in. Laundry baskets, dish scrubbers, pegs, bins - the list is endless. The vast majority of these things do not need to be made in plastic. Indeed, until a few decades ago, all of these things were made in wood, glass, cloth or ceramics. As I move around my house now I am looking at things all the time thinking 'I wonder if I can find that made in something else'. More often than not the answer is yes and even better, they are being handmade by artisan crafters. By looking for these things to replace the plastic ware, I am not only thinking about the planet, I am also supporting a small business. The ideal is to make them myself or to source these things locally, to reduce the distance these items have to travel, but if necessary I will order from further afield. 

BUYING NEW: I have always had a fondness for vintage and antique items, so buying new doesn't happen often here. The trouble with buying new, especially furniture and clothing, is the pollution created in manufacturing, not so much how long you can make it last. There is usually packaging to be disposed of too. I think the thing here is to think about how you like to live. This lifestyle is much more about make do and mend, not keeping up with the trends. I firmly believe that picking up pieces you love, however eclectic the overall look or your home ends up, is far better for the soul than buying a whole new collection of furniture every time you decorate. 

For some ideas about where to find good replacements for the plastic in your life check out my pinterest board 'Sustainable Living' 


Sunday, 5 April 2015

Potting Shed News - Potato Planting

I'm further behind this year than I would usually be, but today I have finally gotten around to checking the potato situation. For reasons of space, I grow all my spuds in containers. In some ways this isn't ideal as containers tend to suffer from heat  during Summer months. When the soil is fluctuating between being hot and dry in the day time, then cool and wet after an evening watering, is bound to upset your average potato plant. That said containers are convenient, easy to use and a great dig-free way of growing. 

In the past I have been known to grown many varieties, often Heritage ones, just to see what they turned out like and because I love nothing more than harvesting a bucket of differently coloured tubers of all shapes and sizes. This year I won't have space or time too get carried away, so I'm sticking to the tried and tested varieties of First and Second Earlies, 'Foremost' and 'Charlotte'. 


I buy my seed potatoes from JBA Seed Potatoes, online if I'm organized enough, or from my local garden centre as they are a stockist. 

The ones I have chitted are really ready to be planted out, so at some point over the next week I shall get out there and clean out my patio potato tubs. Some of these tubers I'll be using at the cottage garden I volunteer at, where they will be dug into a prepared bed the usual way. I will watch with interest which fare better and produce more crops. I'll update the blog later in the year and post my observations. 

Potatoes are worth reading up on a little if you are planning on growing a healthy crop, more so if you want to keep yourself supplied with them for the whole season. Whilst they are one of the easiest crops to have a go with, understanding their cycle and optimum growing conditions will make the process far easier in the long run. Most people will have been told at some point not to eat potatoes if they're green. This green colouring they develop when left in the light is evidence that the potato is producing solanine. This substance, found in members of the Nightshade family of plants, is part if it's natural defense system. This toxicity deters animals and pests which may otherwise feed on it. It also delays the rotting process of the seed tuber. Although some folk say you do not need to chit potatoes, I find this process of starting of the tubers growth and allowing for some greening up worthwhile. 

Sometimes potatoes shoot from multiple places. While this is perfectly normal, it's likely that any shoots coming up from underneath will be broken off during the planting process or just fall away during handling. Often these shoots will already have evidence of small roots coming from them and it's possible to grow these on, independently from the seed potato tuber, into productive plants.


They don't always 'take' but I always give them a go by bring them on in pots until I can see if they are going to grow into decent plants. I've planted a couple of these shoots today, so I will keep the blog updated with their progress....


Fruity Mincemeat

Take 40 minutes out of your day and make enough mincemeat to see yourself and half your family through the mince-pie eating season! I usual...